Amazon EC2 (Elastic Compute Cloud) is the backbone of cloud computing on AWS. Whether you’re hosting a website, running a backend server, or experimenting with DevOps, launching your first EC2 instance is a fundamental skill every developer should have.
In this step-by-step guide, we’ll walk through the entire process of creating an AWS EC2 instance from scratch in 2026 — from logging into your AWS account to connecting to your server via SSH. This guide is beginner-friendly and uses AWS Free Tier eligible options wherever possible, so you can follow along without incurring charges.
In this guide, you’ll learn how to:
- Log in to your AWS account and select a region
- Launch a new EC2 instance
- Configure instance settings, key pairs, and security groups
- Connect to your instance using SSH or Termius
Let’s get started.
Step 1: Log In to Your AWS Account
Head over to aws.amazon.com and log in with your AWS account credentials. If you don’t have an account yet, you can sign up for one — AWS offers a generous Free Tier for new users, which is perfect for learning and testing.
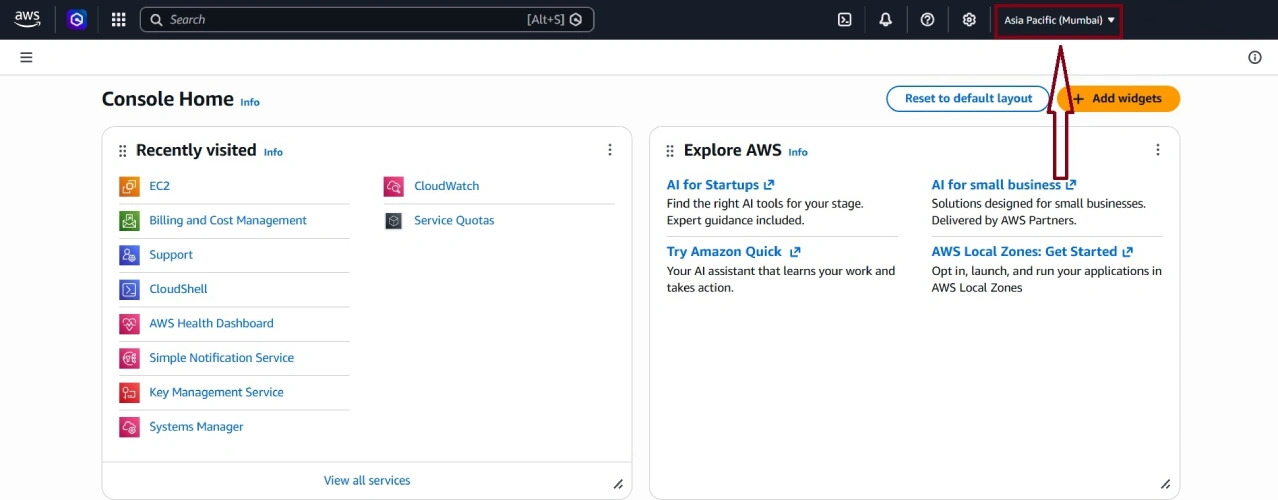
Once you’re logged in, take a moment to select the AWS Region you want to work in. This is typically shown in the top-right corner of the AWS Management Console. Choose a region that’s closest to you or your target audience for the best latency and performance.
Step 2: Launch the Instance
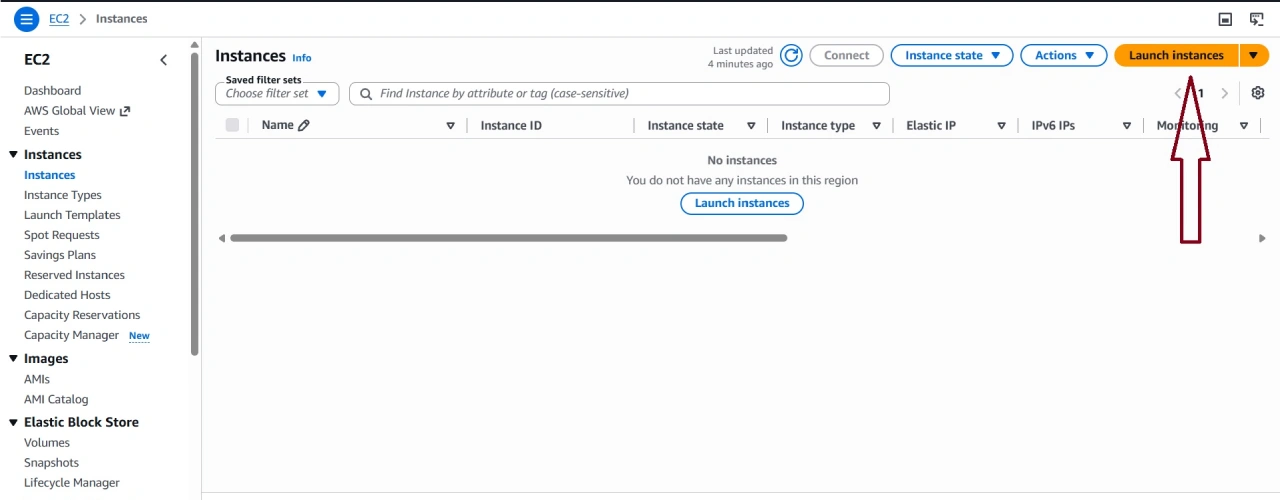
Now that you’re in the AWS Console, it’s time to navigate to the EC2 dashboard.
- In the search bar at the top of the console, type EC2 and select it from the results.
- You’ll land on the EC2 dashboard, where you can see a list of any existing instances (if you have any).
- In the top-right corner, click the “Launch Instance” button to begin creating a new one.
Step 3: Configure the Instance
This is the most important step, where you’ll define exactly what kind of server you want.
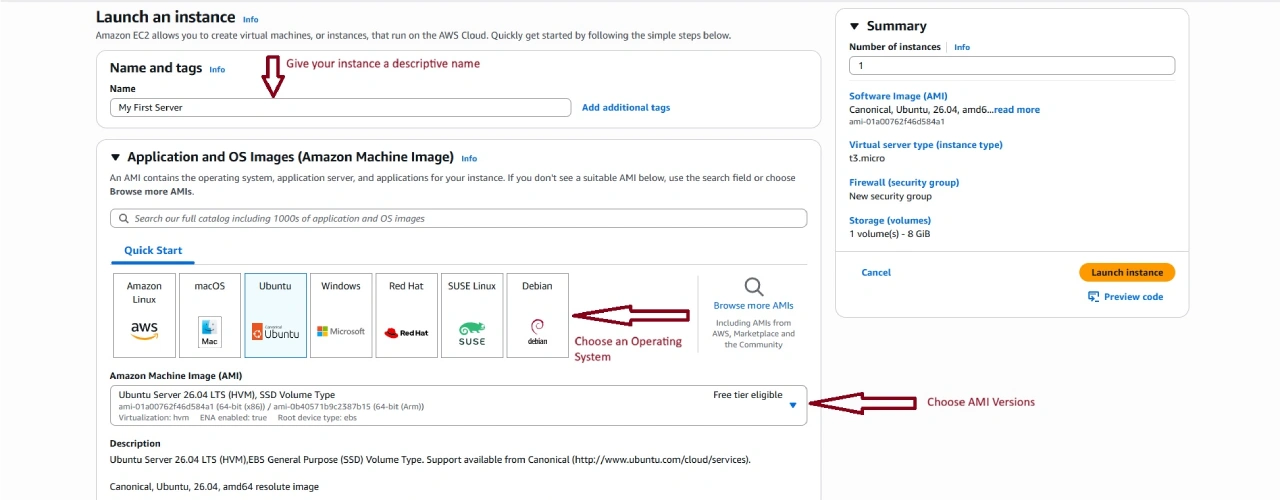
1. Name Your EC2 Instance
Give your instance a clear, descriptive name (e.g., my-first-ec2-server). This makes it easier to identify later, especially if you plan to run multiple instances.
2. Choose an Operating System (AMI)
Select Ubuntu as your Application and OS Image. Ubuntu is a popular choice for developers and is available under the AWS Free Tier. You'll see multiple Ubuntu versions listed — for this guide, we'll go with the latest version that's marked as Free Tier eligible.
3. Choose an Instance Type
Select t3.micro as your instance type. This is a Free Tier eligible option that provides enough compute power for testing, learning, and running lightweight applications.
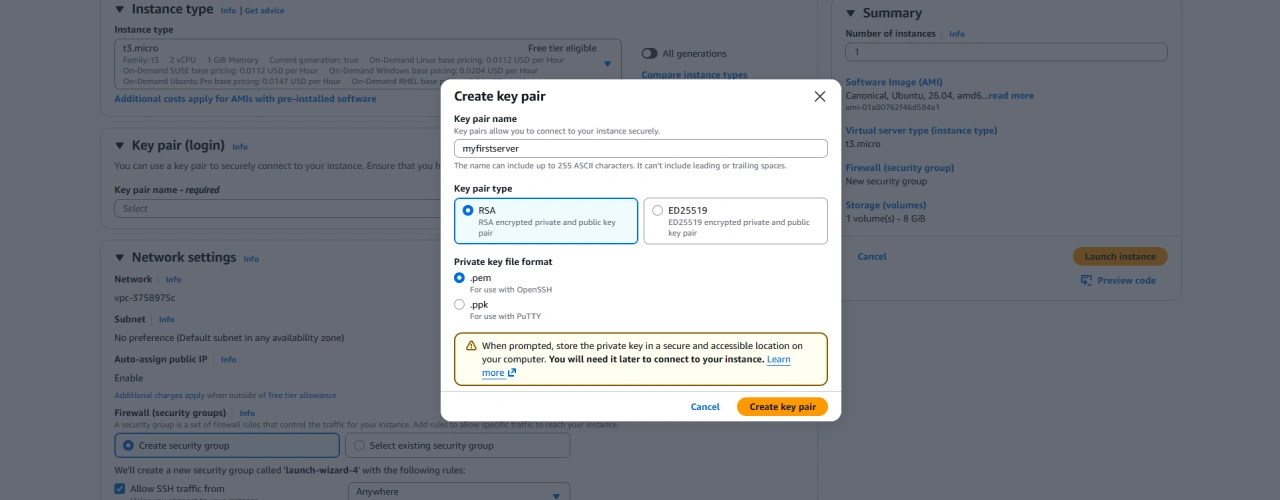
4. Create or Select a Key Pair
Your key pair is what allows you to securely access your server via SSH, so this step is critical.
- Click “Create new key pair” (or select an existing one if you already have it).
- Give it a name and choose the appropriate file format (.pem for OpenSSH clients on macOS/Linux, .ppk for PuTTY on Windows).
- Download and save the key file to a secure location on your computer. You will not be able to download it again, and you’ll need it every time you connect to your instance.
5. Configure the Security Group
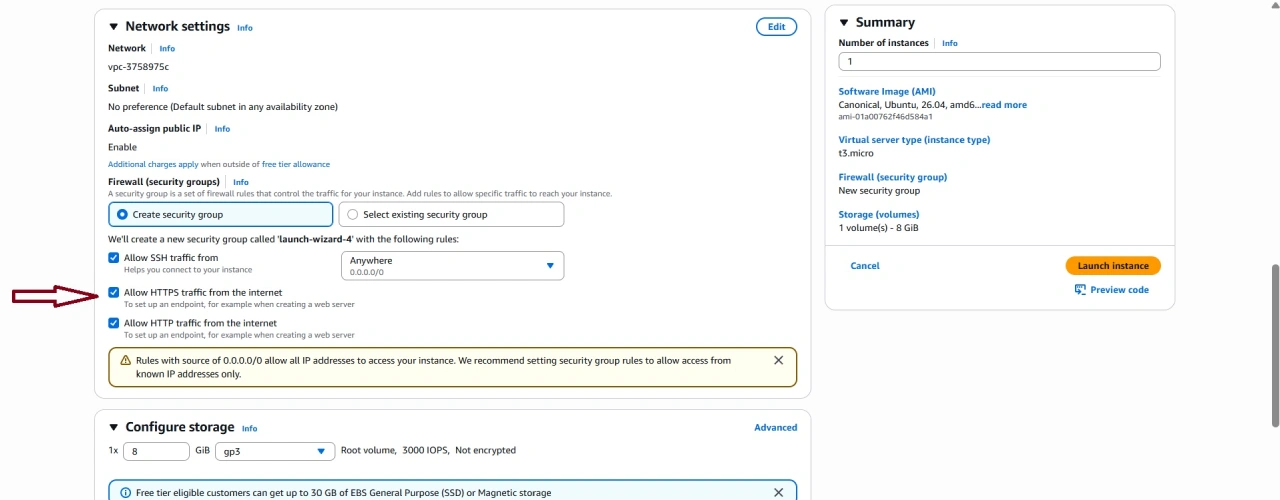
A security group acts as a virtual firewall for your instance, controlling inbound and outbound traffic.
- You can select an existing security group or create a new one.
- For this guide, we’ll create a new security group and enable the following inbound rules:
- Allow SSH traffic (port 22) — required to connect to your server
- Allow HTTP traffic (port 80) — required if you’re hosting a website
- Allow HTTPS traffic (port 443) — required for secure web traffic
6. Configure Storage
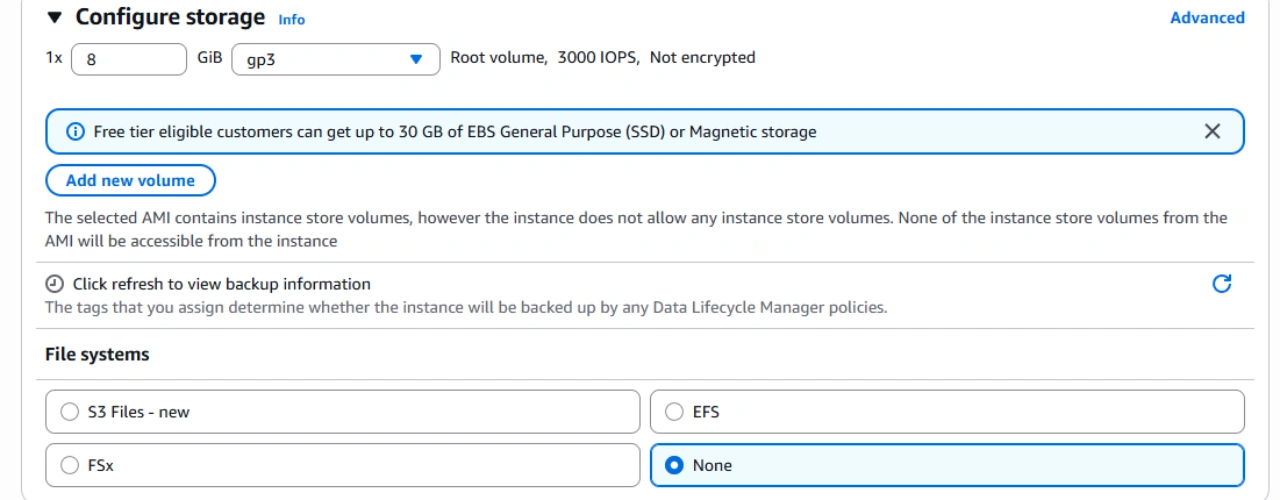
AWS Free Tier includes up to 30 GB of EBS (Elastic Block Store) volume per month. Set your storage size based on your project’s requirements — the default (usually 8 GB) works fine for basic use cases, but you can increase it up to 30 GB and still stay within the Free Tier.
7. Launch the Instance
Once you’ve reviewed all your settings, click “Launch Instance” at the bottom of the page. AWS will take a few moments to provision your new server.
Step 4: Connect to Your EC2 Instance
With your instance up and running, the next step is connecting to it. There are a couple of easy ways to do this.
Option 1: Connect via Command Line (SSH)
Open your terminal (Command Prompt, PowerShell, or a Unix shell) and run the following command, replacing the path and IP address with your own:
- Replace C:\Users\YOUR_USERNAME\Downloads\your-key.pem with the actual path to your downloaded key file.
- Replace YOUR_PUBLIC_IP with your instance’s public IPv4 address, which you can find on the EC2 dashboard under your instance details.
Option 2: Connect via Termius (Third-Party App)
If you prefer a graphical interface over the command line, Termius is a popular and beginner-friendly SSH client.
- Download Termius from termius.com.
- Open the app and click “New Host.”
- Enter your instance’s Public IP address.
- Set the username to ubuntu.
- Add your .pem file as the SSH key.
- Click Connect.
Conclusion
And that’s it — you’ve successfully launched and connected to your first AWS EC2 instance! From here, you can install a web server like Nginx or Apache, deploy your application, set up a database, or start experimenting with cloud infrastructure at your own pace.
Remember to keep an eye on your AWS Free Tier usage to avoid unexpected charges, and always store your key pair file somewhere safe — without it, you won’t be able to access your instance again.
In future guides, we’ll cover topics like setting up a domain name for your EC2 instance, installing an SSL certificate, and deploying a full web application. Stay tuned!